
Doors Are First Impressions!
 Have you ever pondered how one of the first things you see about a person’s home is their front door? I have and that’s why I decided to undertake painting the glass window of our front door (photo’s are at the end of this blog).
Not only does it add some fabulous colour to the inside and outside of your home but it also lends an aspect of privacy (I don’t want any strange faces peering in on me in the night, thank you very much!).
Do’s and Do Not’s of Stain Glass Painting
I used the Dala range of glass paints which are fairly inexpensive. I also used the gold glass paint liner to do the initial drawing work. You’ve got to let the liner fully dry before attempting to add the colour. The liner acts as a container to the glass paint.
Remember that what you are painting is immediately seen on the flip side. In other words, whatever you put down first is what will be seen on the outside. There is no such thing as layering (like in oils and acrylic painting). So think very hard about what colours you want before you apply as there is not going back.
If you are adding writing, you’ve got to write backwards (as in the mirror effect — something I learnt the hard way!).
The first time I attempted stain glass was at our previous house where the glass was already in place. It was a nightmare as you are supposed to paint the glass on a flat surface not standing uprights — glass paint is watery and runs like crazy.
So this time, I was savvy and just after cutting the Perspex (decided it would be better than glass) I laid it flat and began my painting…here are the photo’s I took of the process:
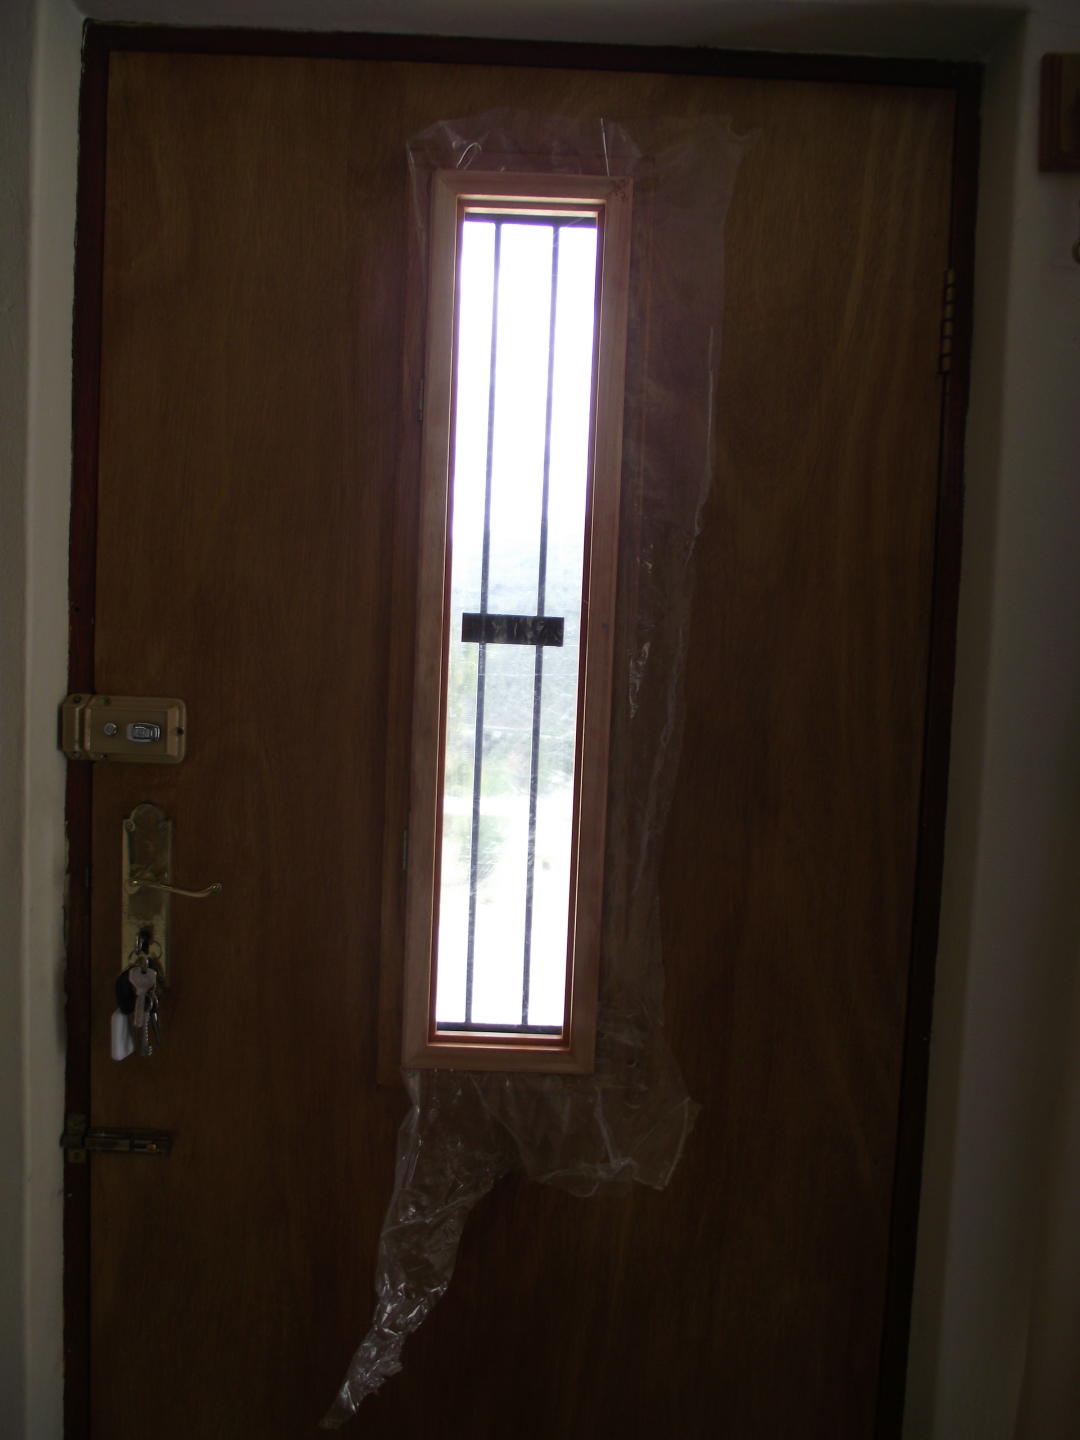
Here is the door without the Perspex (there is some plastic keeping the draft out). See how drab it looks? And anyone can peer in leaving little privacy.

Here is my make-shift work bench as I try to attempt my first Perspex cutting adventure. Cutting Perspex ain’t easy but I got there in the end. I reverted to using a jigsaw coupled with a hand-held saw for the more ‘finicky’ bits.

Here is the work in progress. As you can see, it needs to be laid out flat so you can easily apply the very runny glass paint. The thick gold liner holds the paint in place so don’t forget to close off all gaps in your design or the paint will run out.
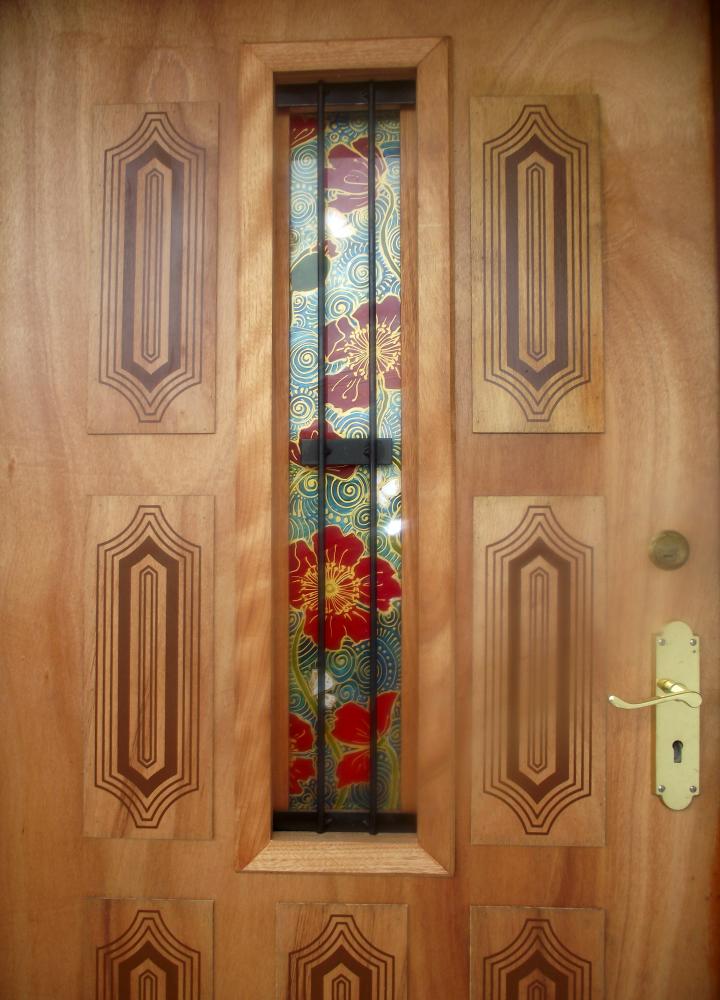
This is the finished product! This is taken from the outside looking in which shows off the design more like a painting (in the next photo you’ll see that the painting takes on a different quality from the inside).
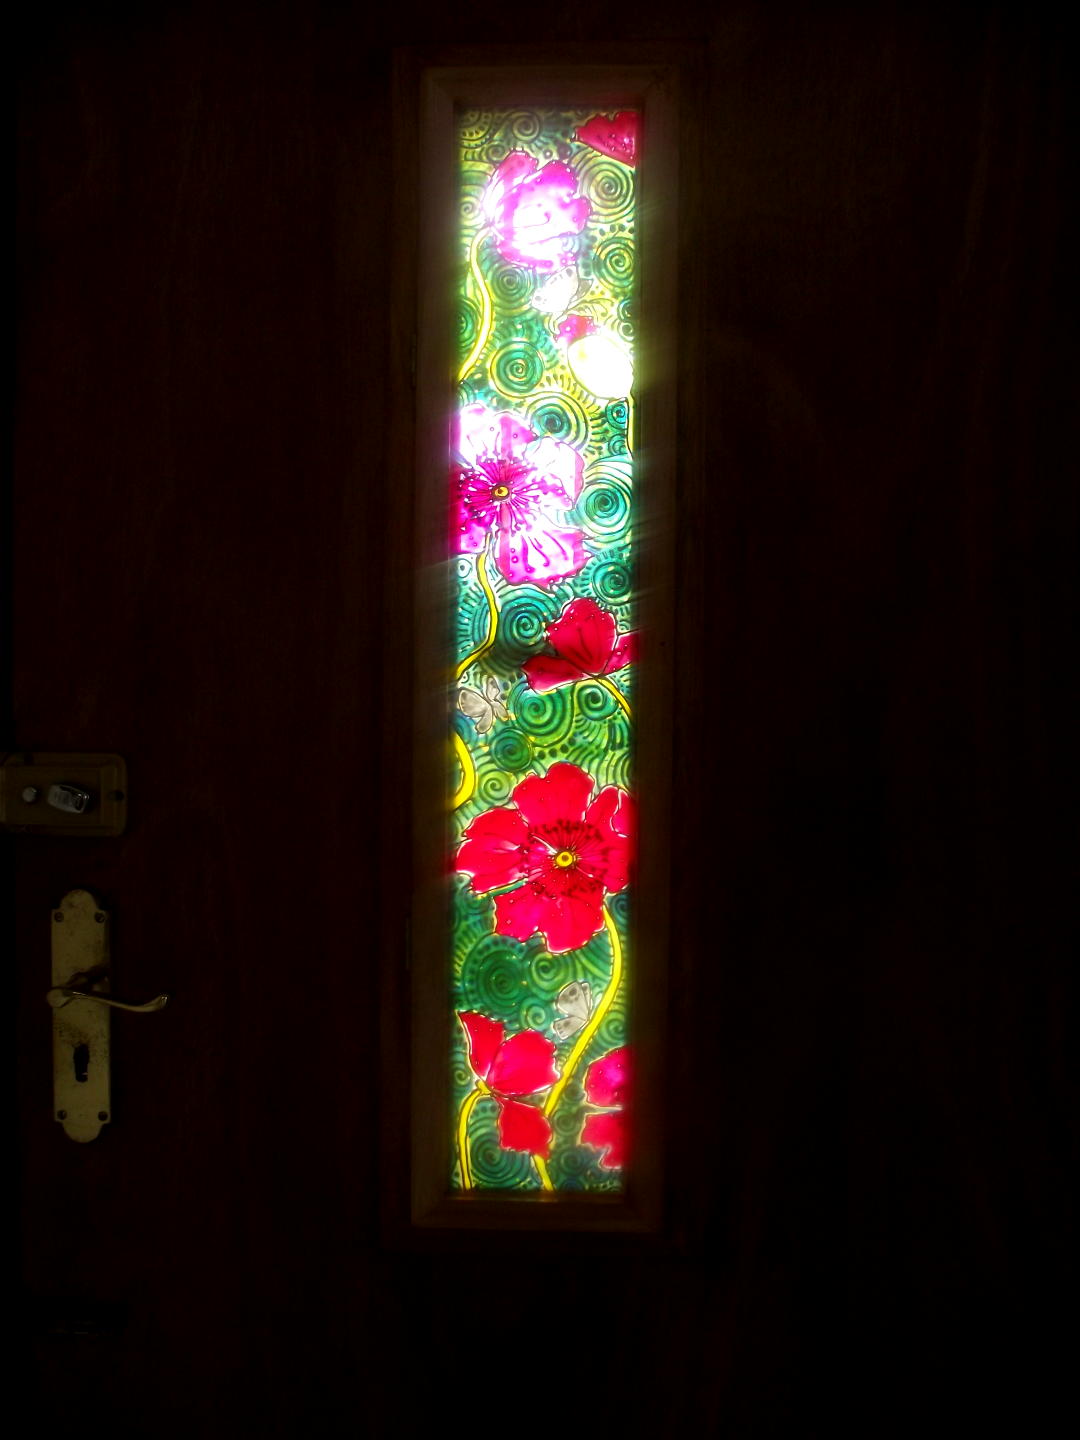 Here is the effect from the inside — the sun is shining right through at this point making for a spectacular colour display.
I hope you enjoyed being a fly on my wall. I’m hoping to do a few blogs about home improvements, etc, so do stay tuned!
Other blogs you may enjoy:
Never-Before-Seen Photographs of How I Paint my Patterned Poppies
Astonishing Ways to Make Your Home Look Like a Luxury Retreat
The Bald-Faced Truth About Self-Portraits — Photographs and All!
Zebra Fever — Jazzing Up Your Walls With Stripes!


![]()

Pingback: Never-Before-Seen Photographs of How I Paint my Patterned Poppies | Cherie Roe Dirksen
Pingback: New Photographs of Painting ‘Iceland Poppy Mix’ and Art on Duvet Covers! | Cherie Roe Dirksen
Pingback: Photo’s: Painting the Extraordinary Life | Cherie Roe Dirksen
Pingback: Out-of-the-Box Arty Outdoor DIY | Cherie Roe Dirksen